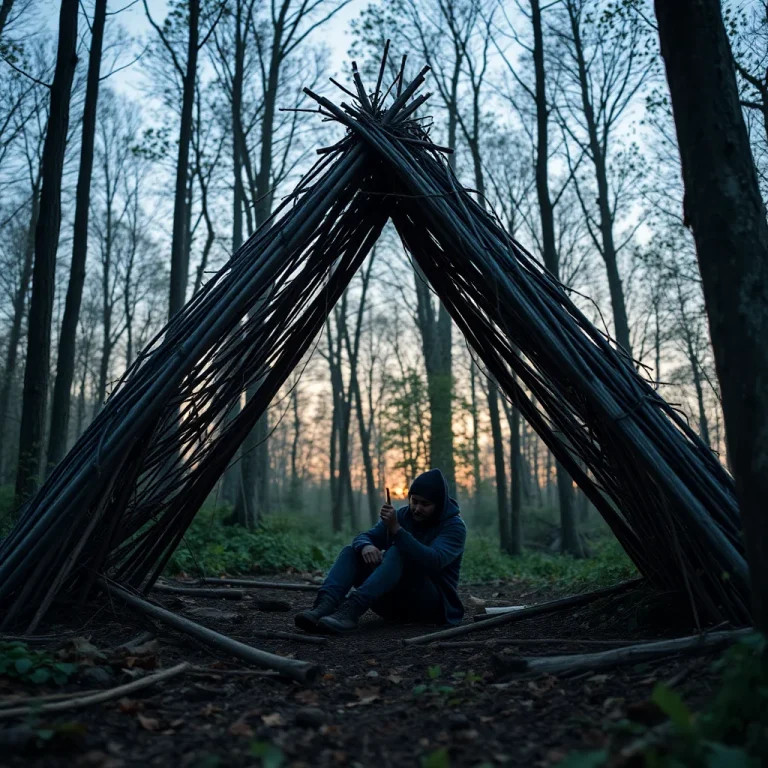
A debris hut built correctly keeps a person alive overnight at 20°F (-7°C) using metabolic body heat alone — no sleeping bag, no fire, no manufactured materials. The design traps body heat in a dead-air insulation layer identical in principle to a sleeping bag. This article covers construction in full detail; the shelter type comparison across all six emergency shelters is in emergency shelter: 6 types you can build.
Site Selection
Select a site that minimizes heat loss before building. Requirements:
- Wind protection: The downwind side of a large tree, rock, or terrain feature. Wind strips heat from the debris surface — a site in a wind channel loses warmth significantly faster than a protected site.
- Dry ground: Avoid low spots, creek banks, and areas below large tree root flares where water pools. Cold wet ground increases conductive heat loss through the debris floor.
- Material abundance: The debris hut consumes an enormous volume of dry leaves and debris. The site should be surrounded by at least 30 minutes’ worth of material within 100 feet. Spending 2 hours building a debris hut with inadequate insulation material is worse than no shelter at all.
Materials Required
No tools are required — everything is gathered by hand from the surrounding forest:
- Ridge pole: One straight branch or small log, 9–12 feet long and approximately 3–4 inches in diameter — strong enough to support debris weight without bending. Sapling-sized rather than branch-sized.
- Upright support: One forked branch or an existing low stump at hip height (approximately 3 feet) to prop the ridge pole at the entry end. Alternatively, lash the ridge pole between two trees at hip height at one end.
- Rib sticks: 20–30 straight branches, thumb-to-wrist diameter, 4–6 feet long — enough to lean along both sides of the ridge pole every 12 inches.
- Lattice material: Thin flexible branches, brush, or boughs for weaving across the ribs to hold debris. Without lattice, debris falls inside the structure.
- Debris: Dry leaves, pine needles, dead grasses, duff, and loose bark. Volume required: approximately 4–6 large armloads per linear foot of the shelter, piled to a 2-foot depth on all sides. A 7-foot sleeping space requires moving a substantial amount of material — plan 1–2 hours just for debris collection.
- Interior bedding: The driest debris available for the sleeping platform — prioritize this material over exterior debris.
Step-by-Step Construction
Step 1 — Set the ridge pole: Prop one end of the ridge pole in the fork of a standing tree, a forked branch lashed upright, or a low stump at hip height. The opposite end rests on the ground. The ridge pole forms the spine of the structure; its angle determines the interior sleeping height. Correct angle: steep enough at the entry end that you can slide in, shallow enough at the far end that the walls close around your feet.
Step 2 — Size the interior: Before adding ribs, lie down next to the ridge pole on the ground and mark the correct interior width — just shoulder-width on each side. A debris hut interior that fits tightly conserves body heat. Every extra foot of width requires your body to heat that additional air volume. Common error: building too wide.
Step 3 — Place the ribs: Lean rib sticks from the ground against both sides of the ridge pole at approximately 12-inch intervals, forming the structural frame. The ribs should touch the ridge pole at the top and splay outward at the ground to match the body-width measurement from Step 2. Rib angle should be approximately 45° — steep enough that debris does not slide down through the framework.
Step 4 — Weave the lattice: Lay thin flexible sticks or brush horizontally across the ribs from ground to ridge, creating a grid that debris will rest on. Weave them through the ribs at 6–8 inch vertical spacing. This step is most commonly skipped by beginners, causing debris to fall into the sleeping space. A lattice takes 20–30 minutes to complete properly.
Step 5 — Pile debris: Begin at the ground and work upward, piling debris against the lattice frame like shingles. Start with larger, coarser material as a base, add finer material toward the exterior. Minimum depth throughout: 2 feet (60cm). Check depth by inserting your arm perpendicular to the shelter wall — your fist should not reach the lattice. On the top, 2 feet is the minimum; 3 feet provides reliable performance at temperatures below 20°F.
Step 6 — Prepare interior bedding: Before entering, fill the sleeping space with the driest available debris to a depth of 12–18 inches. Ground insulation is not optional — bare ground contact drains core temperature faster than any other heat-loss mechanism. The interior debris bed is not for comfort; it is a thermal necessity.
Step 7 — Build a door plug: Gather a large armload of brush, branches, or leaves to pile in the entrance after sliding in. The entrance opening is the largest heat-loss point in the structure. Pulling the door plug in from inside seals it. Mark the plug clearly so you can push it out quickly in an emergency.
Thermal Performance and Failure Modes
A debris hut built to specification maintains a survivable sleeping environment at 20°F (-7°C). The thermal performance degrades rapidly with common construction failures:
- Insufficient debris depth: At 1 foot of debris, thermal protection equivalent drops to a shelter-grade appropriate for 35°F, not 20°F. This is the most common and most dangerous failure.
- Wet debris: Wet leaves compress and lose dead-air insulation value. Dry debris is essential — use the driest available material and avoid debris that has been in standing water.
- Interior too large: An oversized interior requires heating too much air volume. If the debris hut interior is wide enough to roll over freely, it is too wide.
- No lattice: Debris falls through the rib framework into the sleeping space overnight, compressing the insulating walls and reducing debris depth from outside.
Where to Go Next
All six emergency shelter types — with build times and heat-loss mechanisms — are in emergency shelter: 6 types you can build. For tarp-based options that deploy faster, see emergency tarp shelter: 8 configurations with paracord. For layering and clothing systems that prevent hypothermia when shelter construction time is unavailable, see preventing hypothermia without shelter.